Potting Bench Plans PDF: A Comprehensive Guide (Updated 12/31/2025)
Discover expertly crafted plans in PDF format, streamlining your garden workspace build! These resources offer detailed instructions,
saving time and ensuring a successful, durable potting bench construction experience for all skill levels.
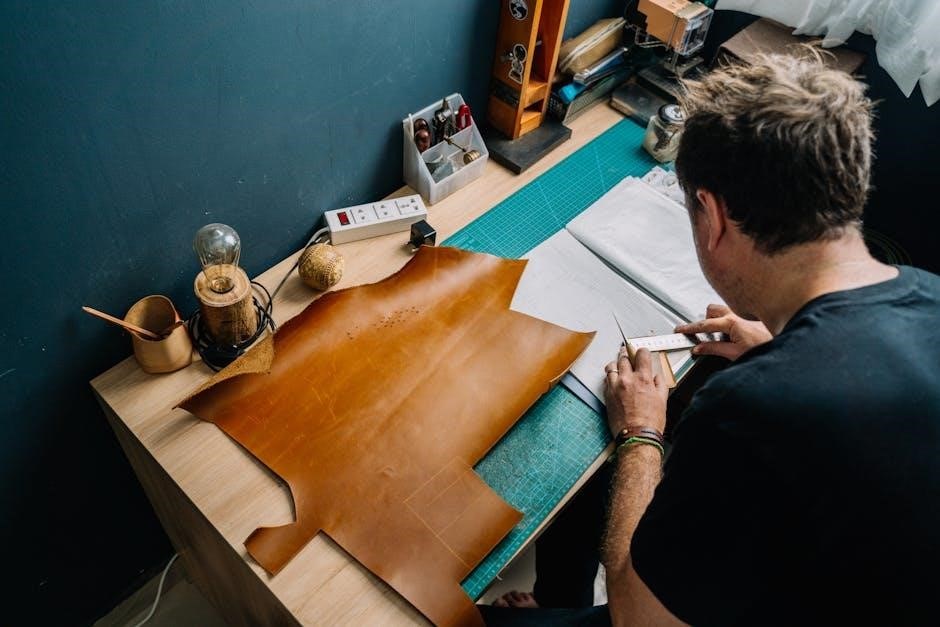
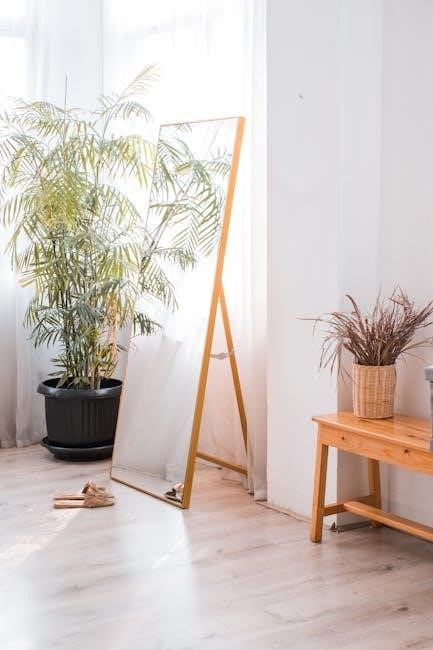
A potting bench is an invaluable asset for any gardener, providing a dedicated, comfortable workspace for starting seeds, transplanting seedlings, and tending to plants. It elevates the gardening experience, reducing strain on your back and keeping essential tools organized and within easy reach. Traditionally, gardeners improvised with tables or makeshift surfaces, but a purpose-built potting bench offers superior functionality and efficiency.

PDF plans have revolutionized the way gardeners approach building these essential structures. They offer a convenient, accessible, and often cost-effective alternative to purchasing pre-built benches. These downloadable documents typically include detailed diagrams, precise measurements, materials lists, and step-by-step instructions, guiding you through the entire construction process. Utilizing PDF plans empowers both novice and experienced DIY enthusiasts to create a customized potting bench tailored to their specific needs and garden space. The availability of both free and premium plans caters to diverse budgets and skill levels, making the dream of a functional potting area attainable for everyone.
Why Use PDF Plans for Your Potting Bench?
Choosing PDF plans for your potting bench project offers numerous advantages. Firstly, they provide a cost-effective solution compared to purchasing a pre-fabricated bench, allowing you to allocate funds towards quality materials. Secondly, PDF plans offer unparalleled customization; you can adapt the design to perfectly fit your available space and specific gardening requirements.
Detailed instructions and visual aids within the plans minimize errors and ensure a smoother building process, even for beginners. Furthermore, PDF format allows for easy printing and portability, enabling you to work at your own pace, anywhere in your garden. Access to a comprehensive materials list streamlines shopping, and the clarity of diagrams reduces ambiguity. Ultimately, PDF plans empower you to build a durable, functional, and personalized potting bench, enhancing your gardening enjoyment and productivity.
Essential Features of a Good Potting Bench
A truly functional potting bench incorporates several key features. Robust work surface durability is paramount, capable of withstanding heavy pots and frequent use. Ample storage solutions – shelves, drawers, or cabinets – are crucial for organizing tools, soil, and supplies, keeping everything within easy reach. Consider a raised work height to minimize back strain during prolonged potting sessions.
Integrated features like a lip or backsplash prevent soil spills, while a dedicated space for pots and trays enhances efficiency. Accessibility is vital; ensure comfortable access to all storage areas; Plans should detail these elements, offering options for customization. A well-designed bench maximizes workspace and minimizes clutter, transforming potting from a chore into a pleasurable gardening experience. Prioritizing these features ensures a lasting and practical addition to your garden.

Types of Potting Bench Designs
Potting bench plans reveal a diverse range of designs to suit varying needs and spaces. Simple & Compact Plans prioritize functionality in limited areas, often featuring a basic work surface and minimal shelving – ideal for small gardens or balconies. Conversely, Potting Benches with Storage Shelves offer extensive organization, accommodating larger collections of tools and materials.
More elaborate designs may incorporate features like drawers, hanging racks, or even built-in sinks. PDF plans often present variations within these categories, allowing for customization. Consider your gardening style and available space when selecting a design. Detailed plans will illustrate dimensions, material lists, and assembly instructions, enabling you to build a bench perfectly tailored to your requirements and aesthetic preferences.
Simple & Compact Potting Bench Plans
These PDF plans focus on efficiency, ideal for gardeners with limited space. Typically, designs emphasize a straightforward construction process using readily available materials. Expect a smaller footprint, often featuring a single work surface and perhaps a lower shelf for essential tools.
Simplicity doesn’t mean sacrificing functionality; these benches provide a dedicated area for potting, seed starting, and plant care. Plans often prioritize portability, allowing for easy relocation within the garden. Detailed diagrams and cut lists ensure accurate assembly, even for beginner woodworkers. Compact designs minimize material costs and build time, offering a quick and affordable solution for creating a practical gardening workspace.
Potting Benches with Storage Shelves
PDF plans for these benches prioritize organization, offering ample space for pots, soil, and gardening supplies. Designs commonly incorporate multiple shelves – both open and enclosed – to accommodate various storage needs. Expect detailed instructions for building sturdy shelving units integrated seamlessly into the bench structure.
These plans often feature larger work surfaces alongside the storage, providing a comfortable area for potting and transplanting. Many designs include features like hanging hooks for tools or dedicated spaces for seed trays. Storage shelves maximize garden efficiency, keeping essential items within easy reach. Detailed cut lists and assembly guides ensure a smooth building process, resulting in a functional and attractive addition to any gardening space.

Materials Needed for Building a Potting Bench
PDF plans will typically detail a comprehensive materials list, often including pressure-treated lumber for weather resistance – crucial for outdoor use. Common wood choices include cedar, redwood, or pine, depending on budget and desired longevity. Expect to need plywood or OSB for shelving and work surfaces, alongside exterior-grade screws and nails for secure assembly.

Hardware requirements frequently encompass hinges for doors or drop-leaf extensions, and potentially metal brackets for added shelf support. Plans may also suggest materials for a protective finish, such as wood sealant or paint. Don’t forget items like sandpaper for smoothing rough edges and wood filler for imperfections. Accurate material quantities, as specified in the PDF, are vital for a successful build, minimizing waste and ensuring structural integrity.
Tools Required for Potting Bench Construction
Your chosen PDF potting bench plan will dictate the necessary tools, but a core set remains consistent. A circular saw or hand saw is essential for cutting lumber to size, while a drill/driver handles screw and nail application. A measuring tape, level, and square ensure accuracy throughout the build process, preventing frustrating misalignments.
Sanding tools, like an orbital sander or sandpaper block, prepare surfaces for finishing. Safety gear – including safety glasses and work gloves – is non-negotiable. More advanced plans might require a miter saw for precise angled cuts or a power planer for smoothing rough wood. Having a hammer, screwdriver set, and potentially a wood clamp on hand will also prove invaluable for efficient and secure assembly, as detailed in your PDF guide.
Step-by-Step Guide to Building a Basic Potting Bench (Based on PDF Plans)
Begin by carefully studying your chosen PDF plan, familiarizing yourself with all components and measurements. Typically, construction starts with building the frame – cutting lumber according to the plan and assembling the legs and support structures using screws or nails. Ensure squareness at each stage using a level and square for stability.
Next, attach the tabletop and any shelving units, again referencing the PDF for precise placement. Reinforce joints with wood glue for added durability. Finally, add any desired features like a backsplash or lip, following the plan’s instructions. Regularly check for levelness and make adjustments as needed. Your completed potting bench, guided by the PDF, will provide a functional and enjoyable gardening workspace!

Customizing Your Potting Bench
Beyond the basic PDF plan, personalize your potting bench! Adding a backsplash or lip prevents soil spills and keeps tools contained, easily achieved with extra lumber cut to size and secured with screws. Consider integrating a sink or water source for convenient watering and cleanup – this may require plumbing knowledge or professional assistance.
Enhance storage with hooks for hanging tools or additional shelving tailored to your needs. Painting or staining the bench protects the wood and adds aesthetic appeal. Refer to your PDF plan for structural considerations when making modifications, ensuring stability and safety. Don’t hesitate to adapt the design to perfectly suit your gardening style and available space!

Adding a Backsplash or Lip
A backsplash or lip is a simple yet effective customization for your potting bench, significantly reducing soil spillage during messy tasks. Most PDF plans can easily accommodate this addition; typically, it involves attaching a strip of wood along the back edge of the work surface.
Use weather-resistant lumber like cedar or treated pine for durability. Secure the backsplash with screws, ensuring a flush fit. The height of the lip is a matter of preference – 2 to 4 inches is common. Consider a slight outward curve to further contain soil. This small addition, guided by your PDF plan, keeps your workspace cleaner and more efficient, enhancing your potting experience.
Integrating a Sink or Water Source
Elevate your potting bench’s functionality by incorporating a sink or readily available water source. Many detailed PDF plans offer guidance on integrating these features, ranging from simple hose connections to full plumbing installations.
Consider a durable, waterproof sink material like stainless steel or a heavy-duty plastic basin. Ensure proper drainage is included in your plan, connecting to a suitable waste system; For simpler setups, a hose bib can be mounted nearby for convenient watering. Remember to account for water weight when reinforcing the bench structure. Carefully review your PDF plan’s instructions regarding plumbing and electrical considerations for a safe and efficient setup.
Choosing the Right Potting Mix
Successful plant propagation hinges on selecting the ideal potting mix, and your new potting bench is the perfect workspace for this crucial step! PDF plans often don’t detail mix specifics, leaving that to your horticultural knowledge. However, understanding the differences between mixes is vital.
Consider your plants’ needs: all-purpose mixes suit many, while seed starting mixes offer a finer texture for delicate seedlings. Avoid garden soil, as it compacts too easily. Premium mixes provide excellent drainage and aeration, promoting healthy root development. DIY options, detailed elsewhere, offer cost savings and customization. Refer to plant-specific guides alongside your potting bench plans for optimal results, ensuring thriving plants from the start.
Potting Mix vs. Potting Soil: Understanding the Difference
While often used interchangeably, “potting mix” and “potting soil” aren’t the same! Your meticulously built potting bench deserves the best growing medium, so understanding this distinction is key. True “potting soil” contains actual soil – often undesirable in containers as it compacts, hindering drainage and root health.
“Potting mix,” however, is soilless, comprised of ingredients like peat moss, vermiculite, and perlite. This blend provides optimal aeration and drainage. PDF plans for your potting bench won’t specify this, assuming basic horticultural knowledge. Choosing a mix over soil prevents root suffocation and ensures efficient nutrient uptake. Consider the specific needs of your plants when selecting a mix, maximizing their growth potential on your new workspace.
DIY Potting Mix Recipes
Once your potting bench, built from your PDF plans, is complete, crafting your own potting mix elevates your gardening game! Commercial mixes can be costly, and quality varies. Taking control allows for tailored blends perfectly suited to your plants’ needs.

For an all-purpose mix, combine equal parts peat moss, perlite, and vermiculite. This provides excellent drainage and aeration. Seed starting requires a lighter touch: blend one part peat moss with one part perlite. These recipes save money and ensure a healthy start for seedlings. Experimenting with compost adds valuable nutrients. Your new potting bench becomes the hub for creating these custom blends, fostering thriving plants and a rewarding gardening experience!
All-Purpose Potting Mix Recipe
With your newly constructed potting bench – thanks to those helpful PDF plans – creating a versatile all-purpose mix is simple! This blend supports a wide range of plants, providing optimal drainage and aeration for robust growth. The foundation is equal parts peat moss, perlite, and vermiculite. Peat moss retains moisture, while perlite and vermiculite improve drainage and aeration, preventing root suffocation.
For a standard batch, use 1 cubic foot of each component. Mix thoroughly on your spacious new bench! Consider adding a slow-release fertilizer for sustained nutrient delivery. This all-purpose mix is ideal for repotting houseplants, starting vegetables, and nurturing flowering annuals. Enjoy the satisfaction of providing your plants with a custom-made, nutrient-rich growing medium!
Seed Starting Mix Recipe
Now that your potting bench, built from those excellent PDF plans, is ready, let’s focus on nurturing new life! Seed starting requires a delicate balance – excellent drainage and a light texture for tender roots. This recipe combines equal parts peat moss, vermiculite, and perlite. Vermiculite holds moisture crucial for germination, while perlite ensures aeration, preventing damping-off.
A typical batch uses 1 cubic foot of each ingredient. Mix thoroughly on your sturdy bench surface! Avoid garden soil, as it can harbor diseases and compact too easily. Consider adding a small amount of compost for added nutrients, but use sparingly. This mix provides the ideal environment for seeds to sprout and develop strong, healthy roots, setting your seedlings up for success!
Optimizing Plant Growth with Potting Media
With your potting bench – constructed using those helpful PDF plans – firmly in place, understanding potting media is paramount for thriving plants. Successful container gardening hinges on selecting a medium that balances aeration, drainage, and nutrient retention. Consider the plant’s specific needs; some prefer a lighter, airier mix, while others require more moisture retention.
Regularly assess moisture levels – a well-draining mix prevents root rot, while adequate moisture supports healthy growth. Proper container selection is also key; ensure drainage holes are present. Adjust your watering practices based on the media and environmental conditions. Utilizing the right potting media, alongside your new bench, will unlock your plants’ full potential!

Where to Find Free & Premium Potting Bench Plans (PDF)
Embarking on your potting bench project? Numerous online resources offer PDF plans, catering to diverse skill levels and budgets. Websites dedicated to DIY projects frequently host free plans, ideal for beginners or those seeking simple designs. However, these may lack detailed instructions or advanced features.
For more comprehensive plans, consider premium options available on platforms specializing in woodworking or gardening. These often include detailed cut lists, 3D renderings, and step-by-step guidance. Explore online marketplaces and dedicated woodworking plan websites. Remember to check reviews and preview the plans before purchasing to ensure they align with your needs and capabilities – a well-chosen plan is the foundation of a successful build!